Synchronizing calendars and contacts on an Android device#
This method allows you to synchronize your address-books and calendars between the server and an Android device.
To synchronize your contacts and calendars with different applications, the most effective solution is to go through an application that will mainly take care of synchronization: DAVx5.
This application is paid for (€6) on the Google application store or free on F-droid (an alternative store, only offering free apps without ads).
Google Play store (6€)
First launch#
When launching DAVx5, do not check the boxes concerning task management (Fig. 4.1).
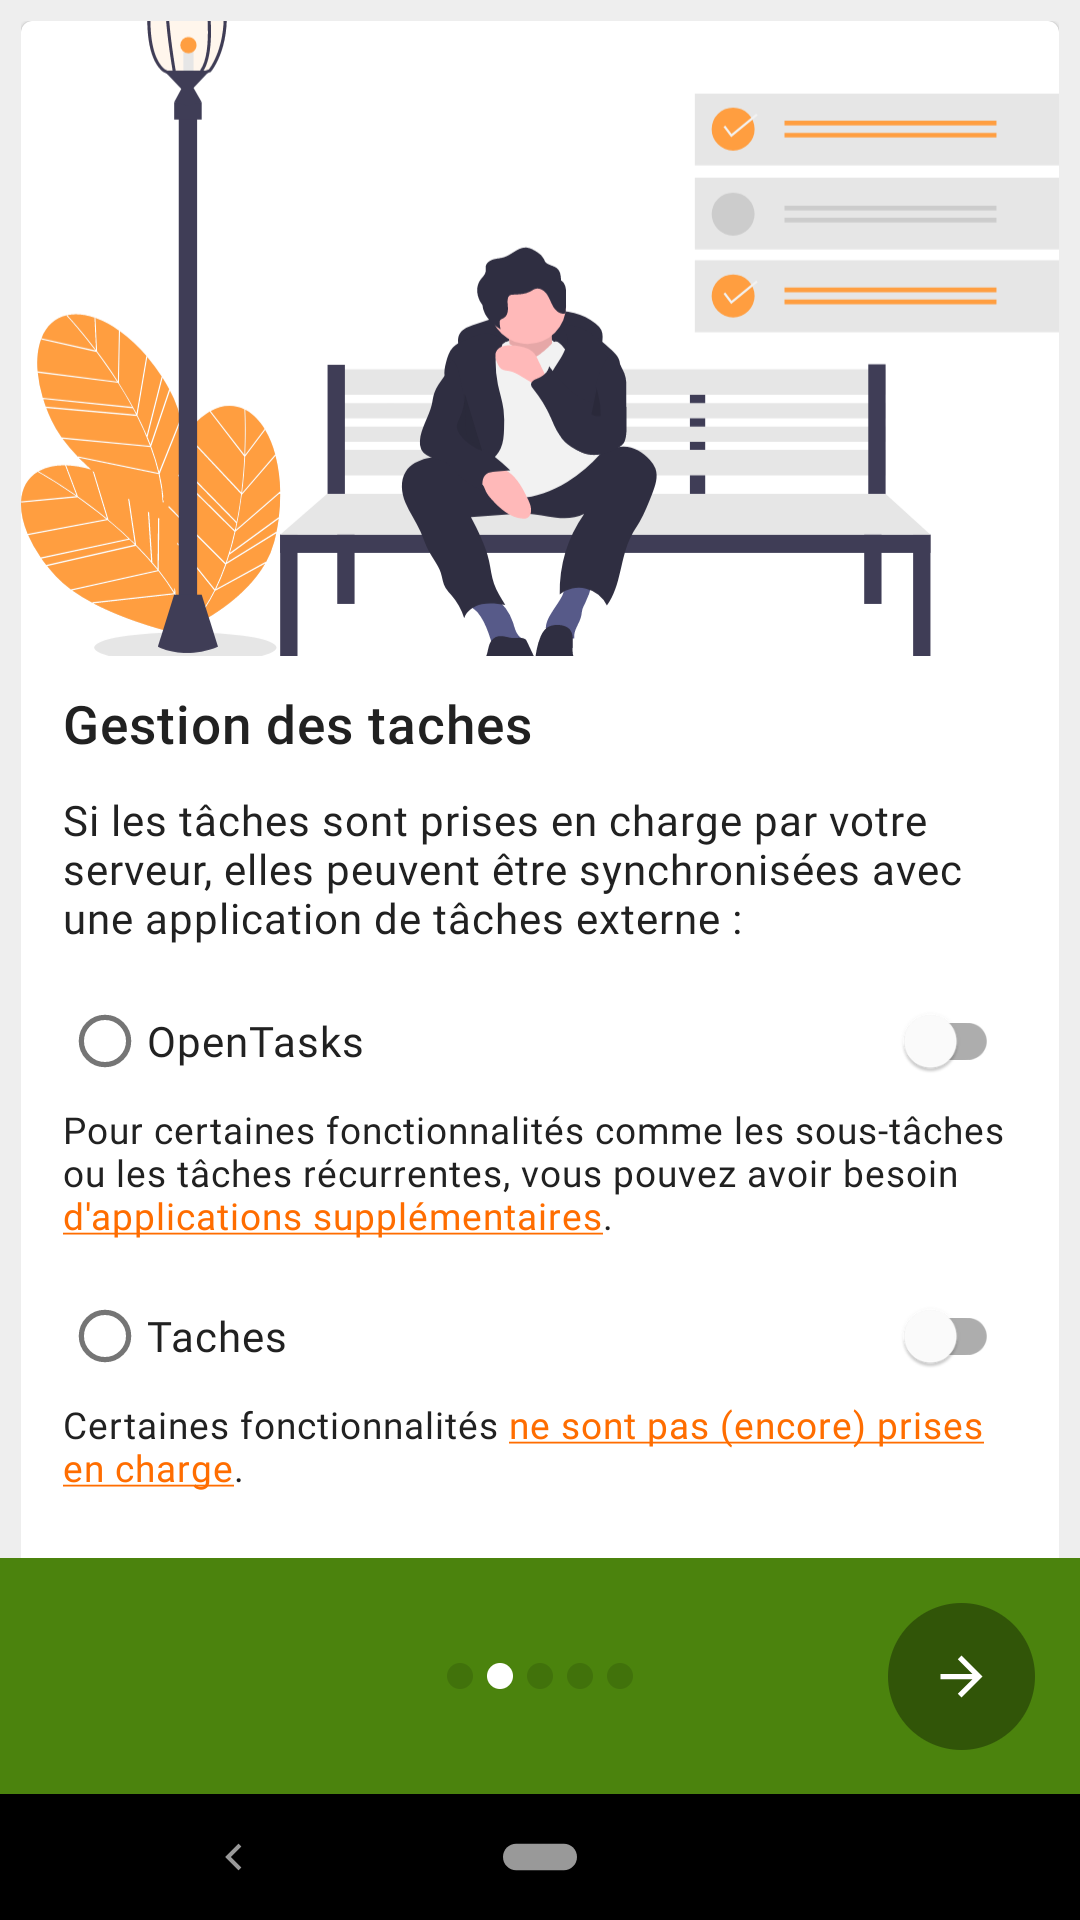
Fig. 4.1 Task management.#
Then, allow it access to contacts and calendars (everything) (Fig. 4.2).
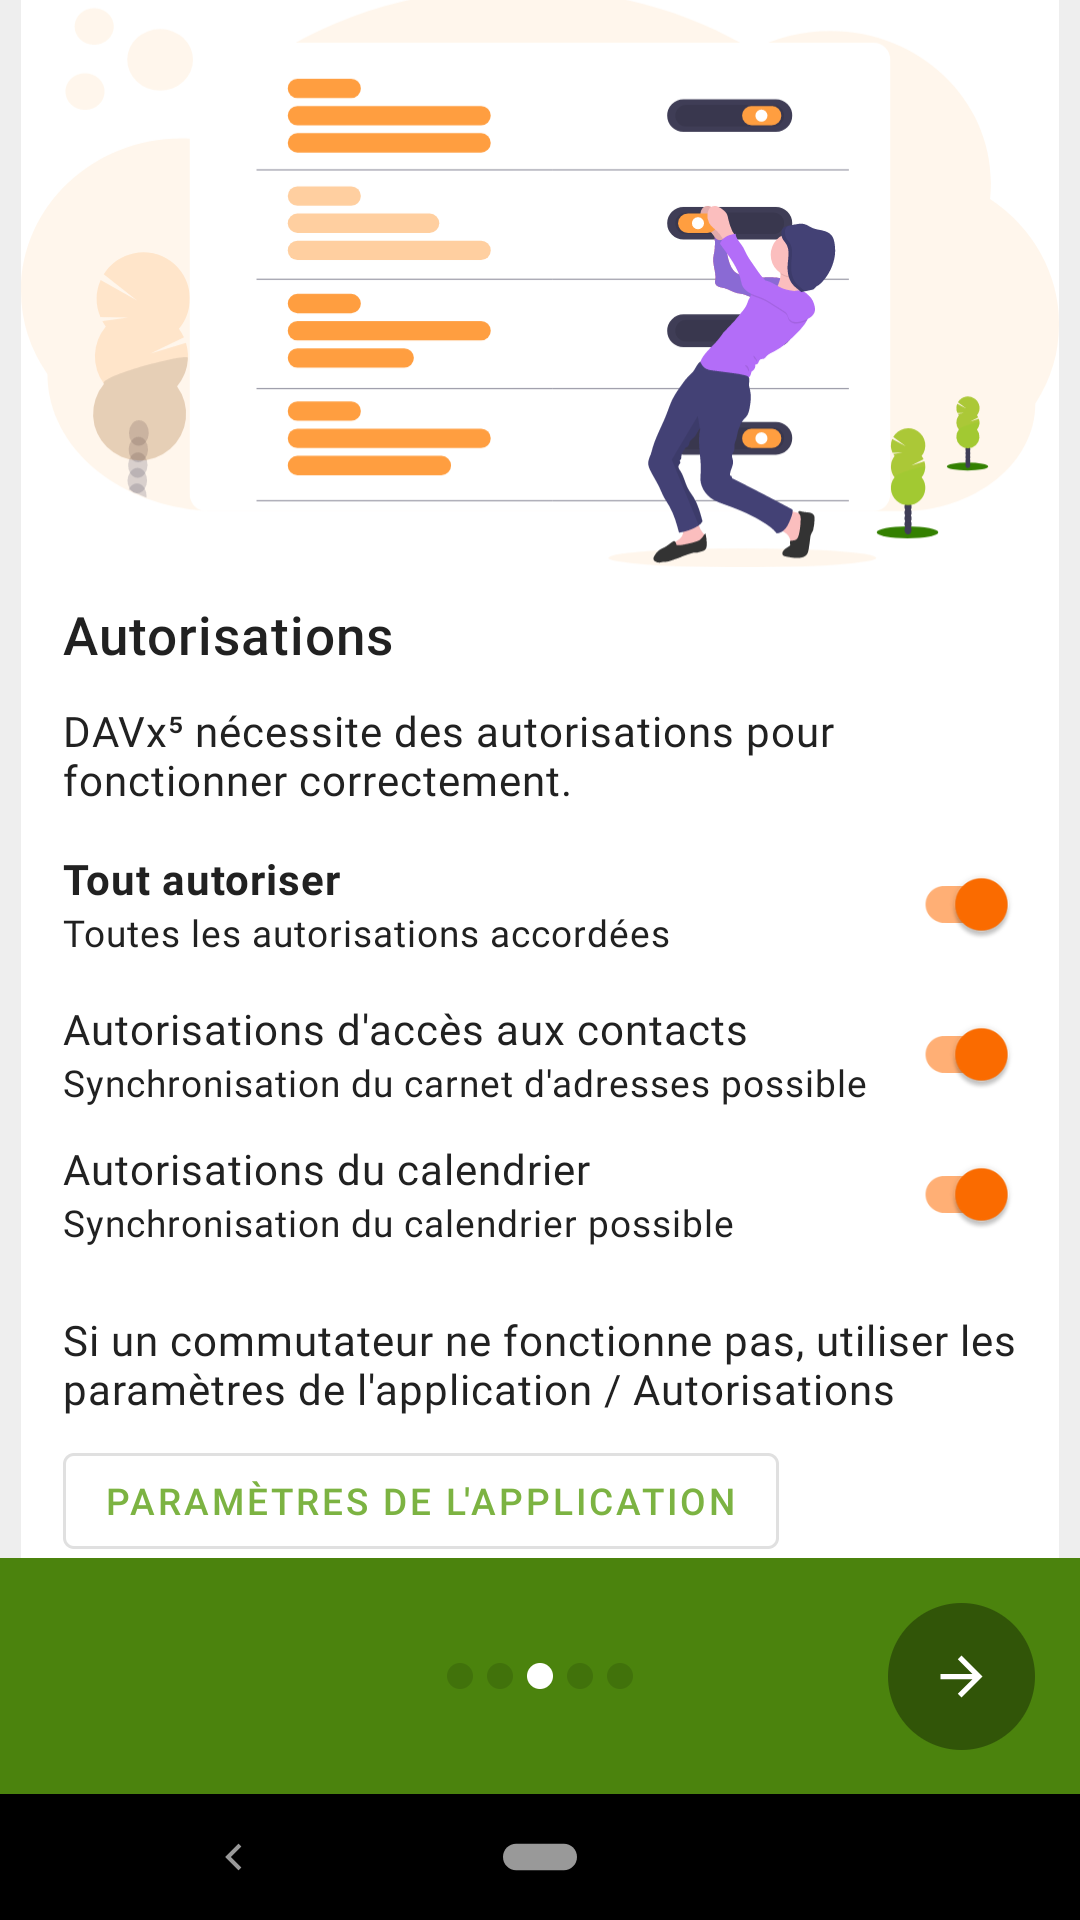
Fig. 4.2 Grant permissions.#
Finally, for more comfort, it is recommended to activate the synchronization at regular intervals (Fig. 4.3).
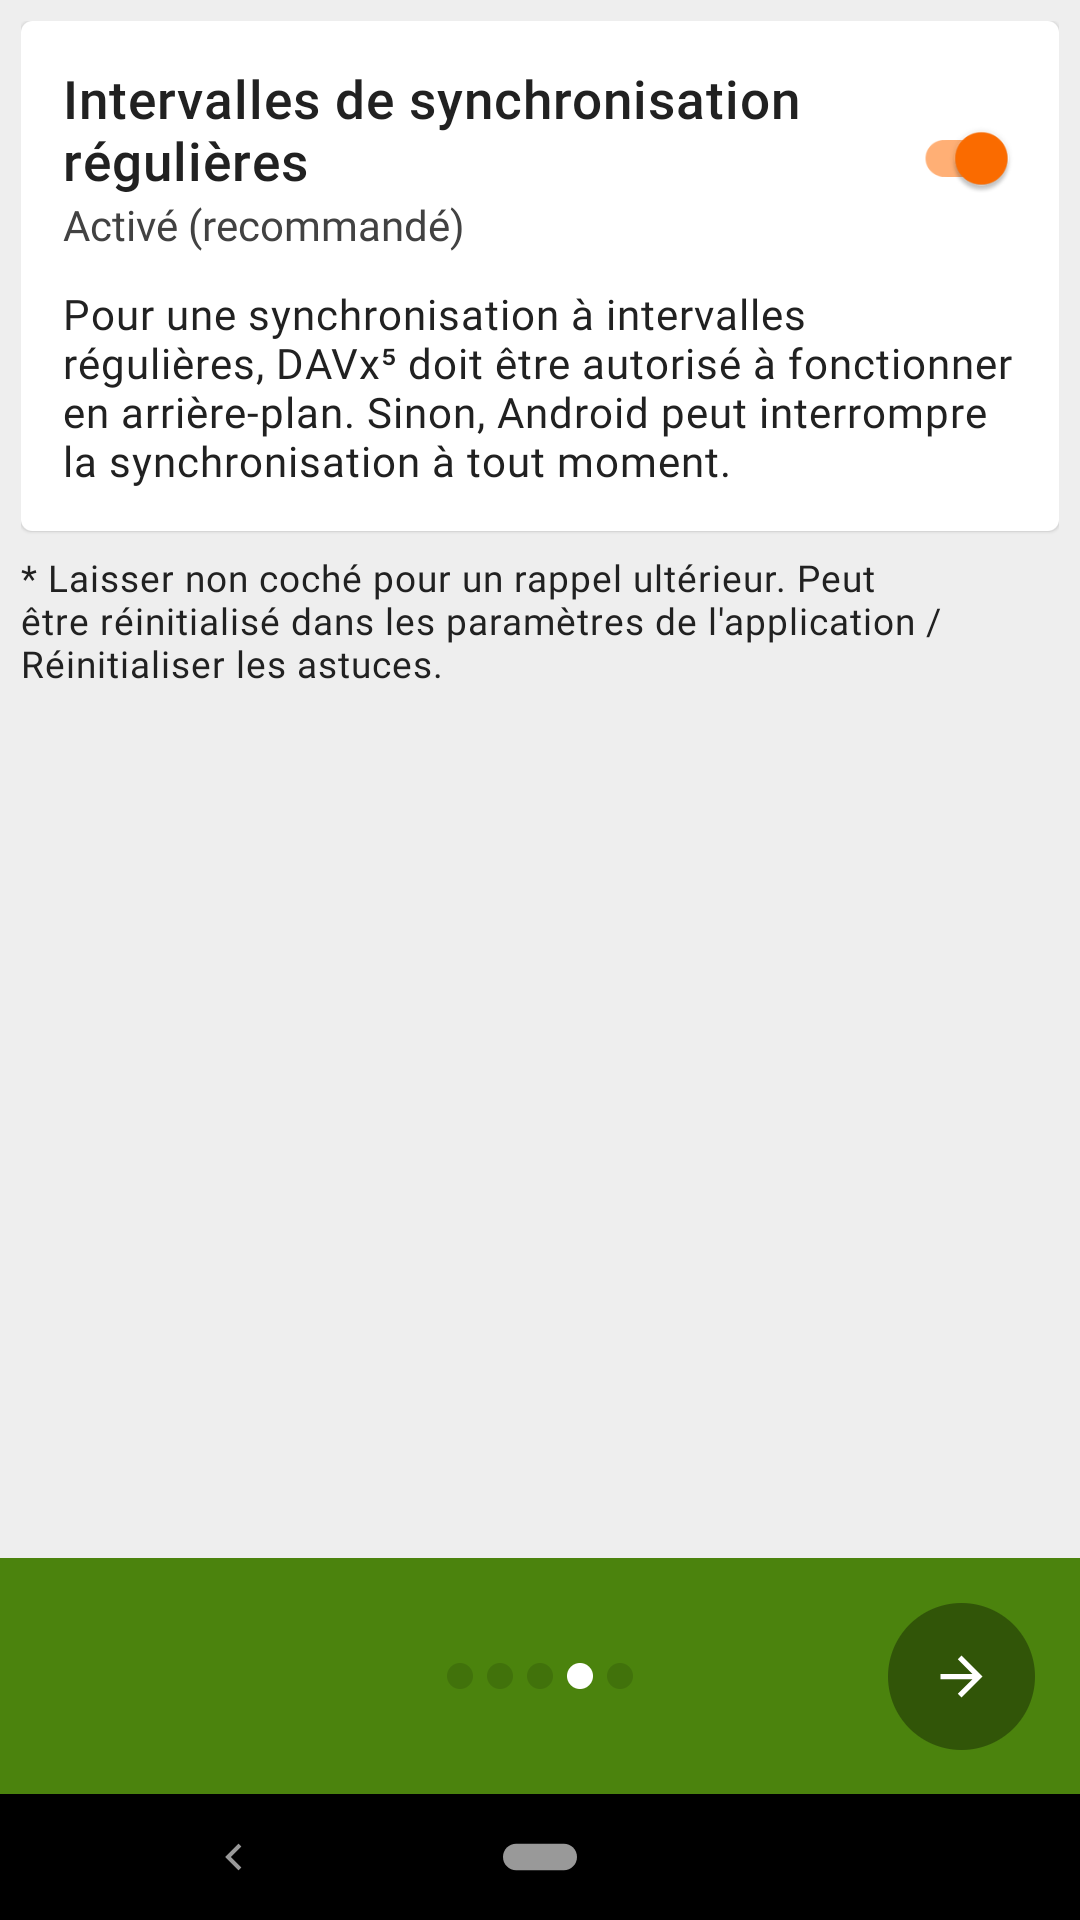
Fig. 4.3 Synchronization at regular intervals.#
Adding the DAV account#
To add a new sync account, press the orange button on the bottom right (Fig. 4.4).
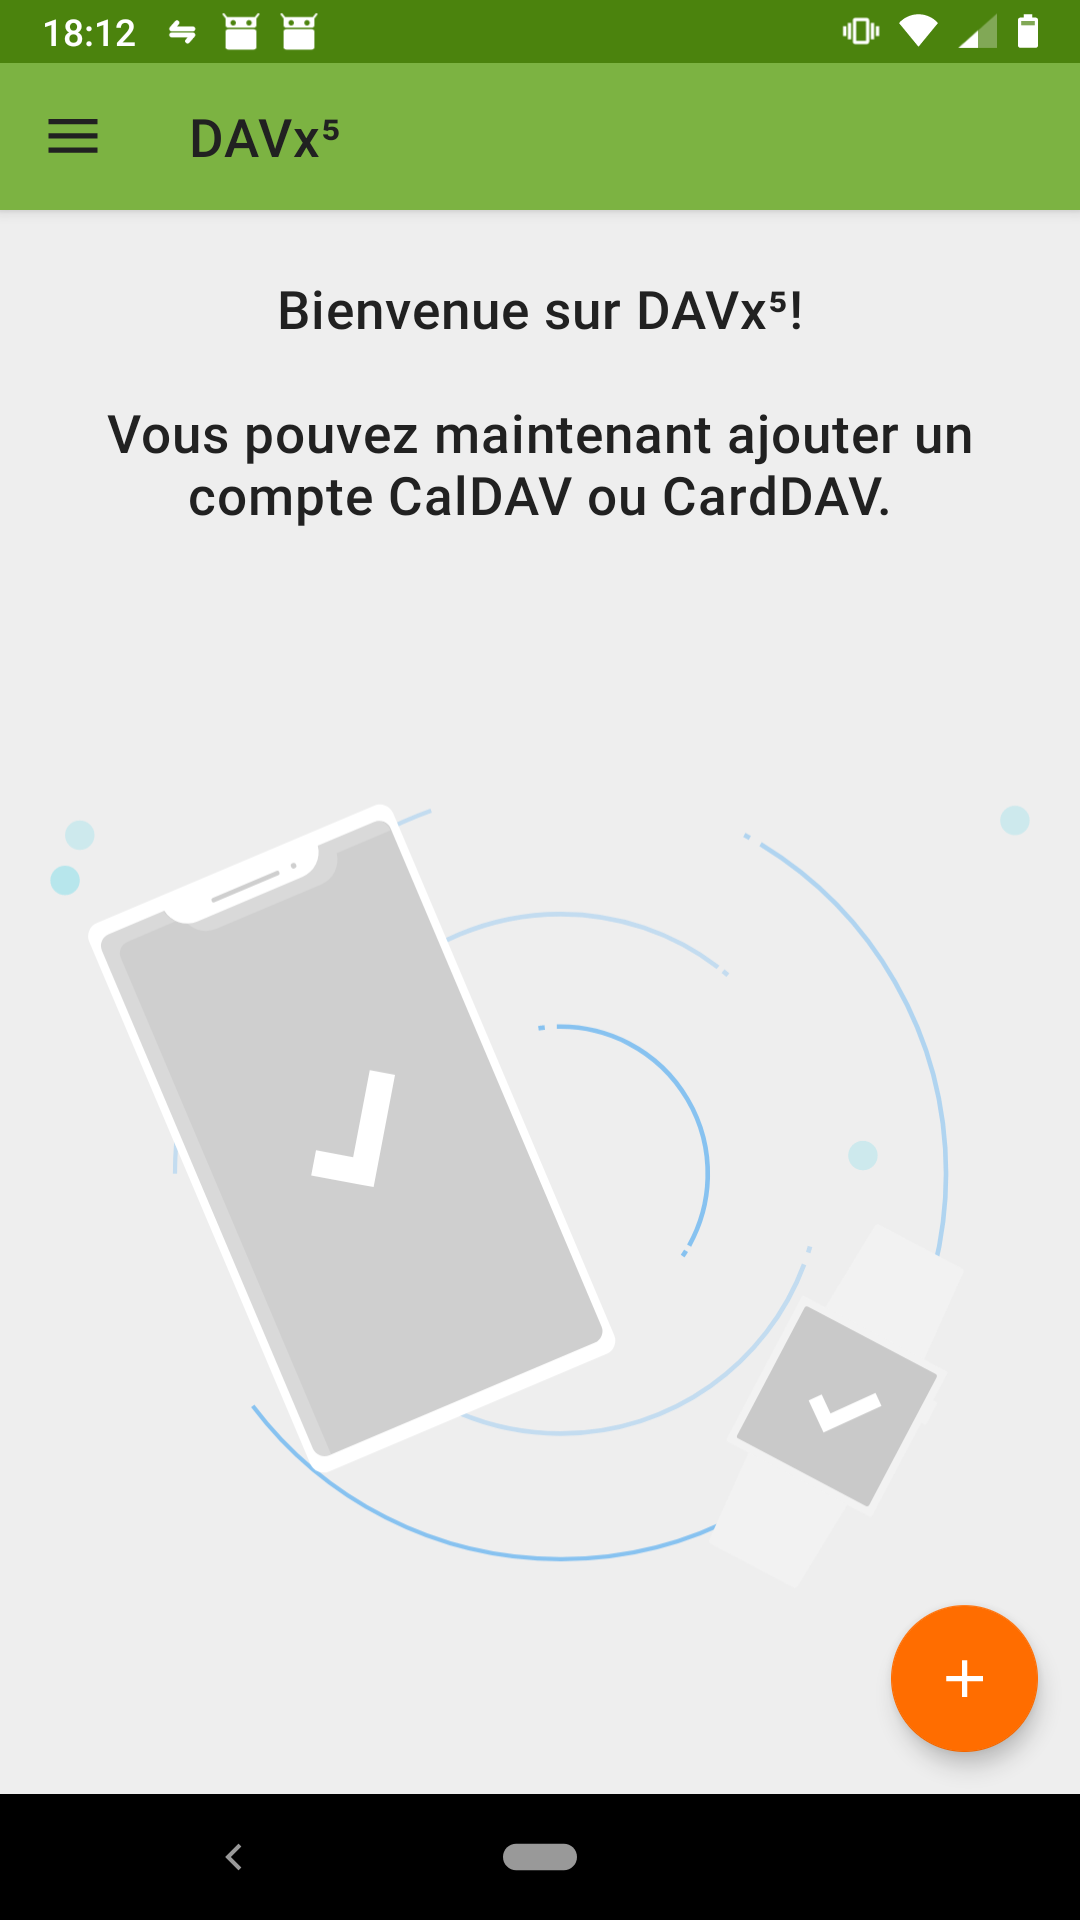
Fig. 4.4 DAVx5 home screen.#
Select the second option: “Login with URL and username” (Fig. 4.5).
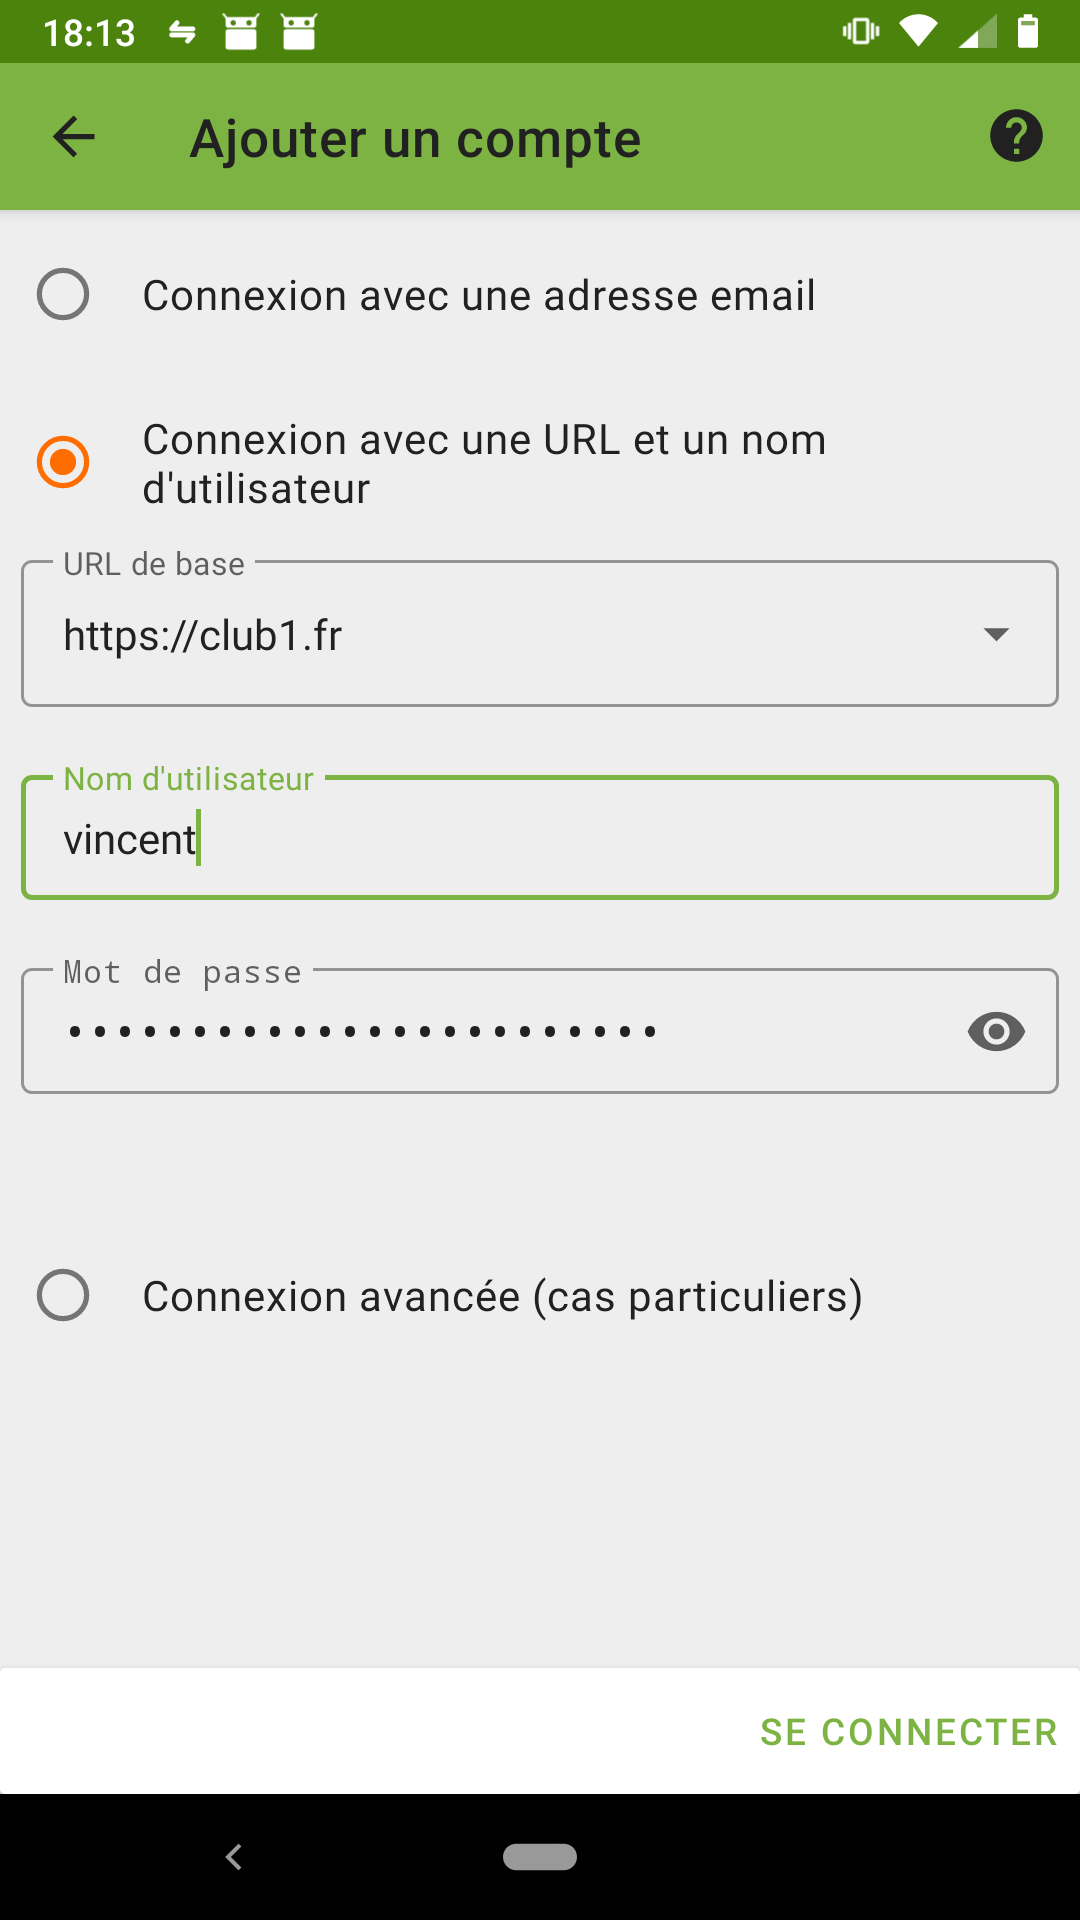
Fig. 4.5 Login with URL and username.#
Base URL:
https://club1.fr
The username and password are your CLUB1 credentials.
If you have filled in everything correctly, DAVx5 will now suggest a name for this account that is very likely to resemble your CLUB1 email address. This seems to be a good idea because this is often how a pair of user@server is identified. One last little detail: It is recommended to use the method “Groups are categories for each of the contacts” to be compatible with the web mail client of CLUB1 (Fig. 4.6).
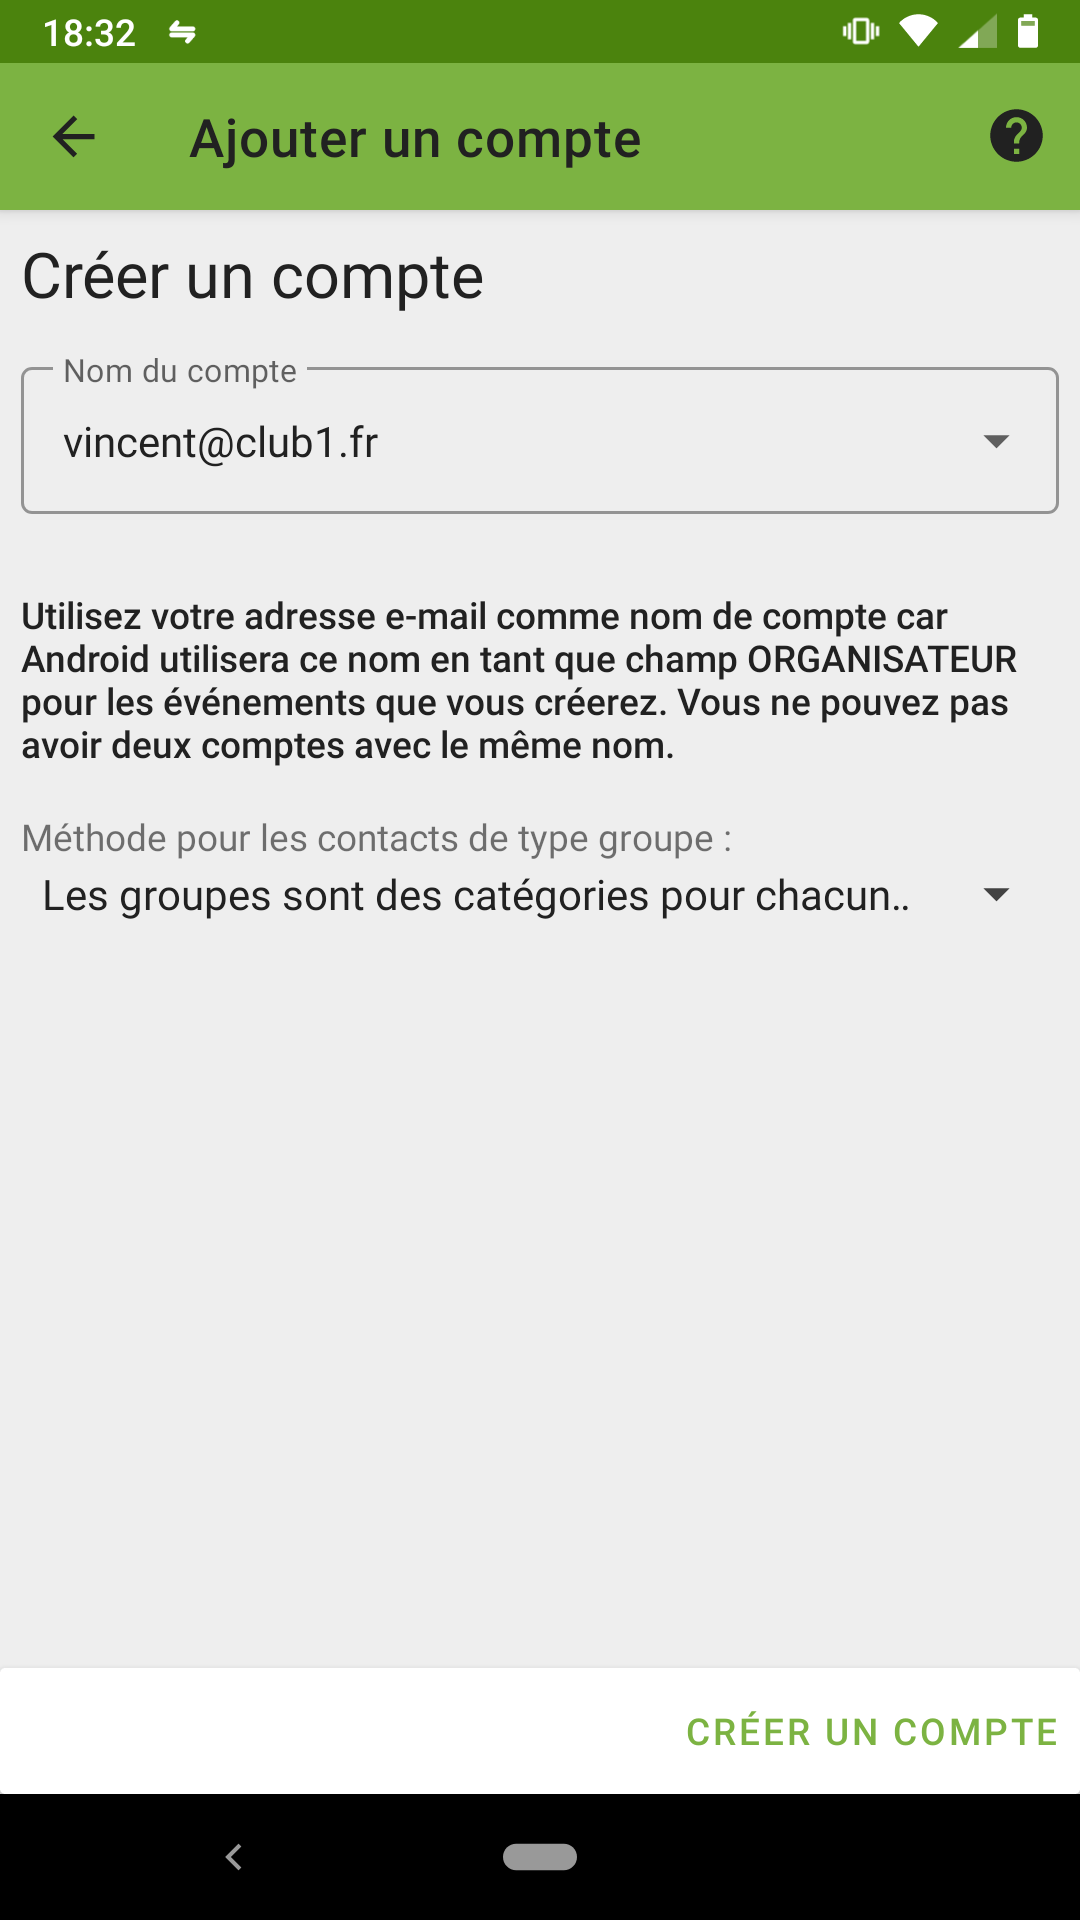
Fig. 4.6 Groups storage method.#
One last step: what to synchronize?
DAVx5 lets us select the contact books and calendars you want to synchronize on your phone (Fig. 4.7). To do this, simply tick them by navigating between the “Address books” and “Agendas” tabs. It will always be possible to access and modify these settings later very easily.
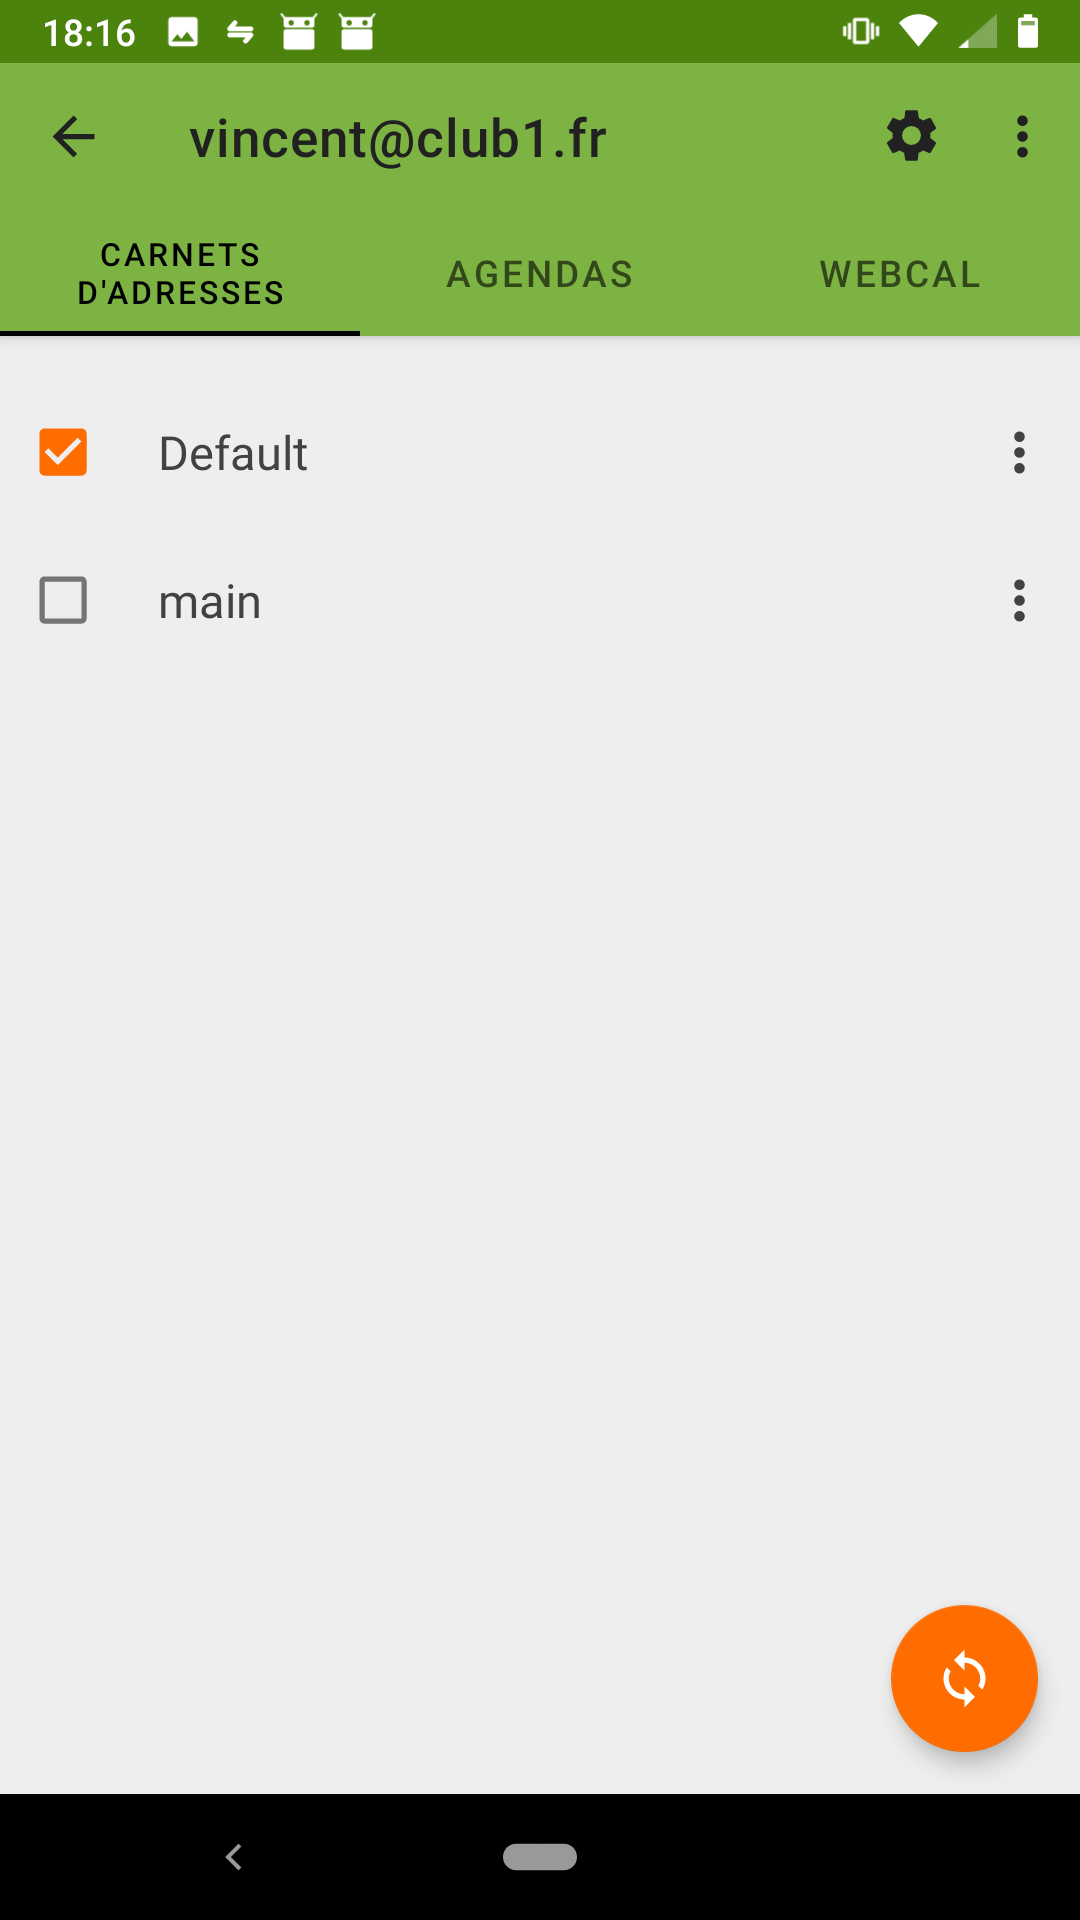
Fig. 4.7 List of available address books.#
Note
By default, even if you have not yet created any address books or calendars, there will always be one called: “Default”.
From this interface, it is also possible to __create or delete __ address books or calendars, via the menu at the top right.
Whenever you make changes there, it’s a good idea to re-run a sync by pressing the orange button at the bottom right.
Conclusion#
There you go! If all goes well, you have successfully synchronized your contacts and/or calendars between the CLUB1 server and an Android device. The synchronized address books and calendars are now accessible via the contact app of your choice and the calendar app of your choice.
If you prefer to use free and non-Google-oriented apps, we recommend Fossify Contacts and Fossify Calendar.
Fossify Contacts: F-Droid – Google Play Store
Fossify Calendar: F-Droid – Google Play Store